If you’re ready to bake something creepy yet crowd-pleasing this Halloween, look no further than these spooky Halloween fingers. With their gnarly shapes, almond “nails,” and red jam “blood,” they’re the perfect combination of fright and flavor. These cookies aren’t just fun to eat—they’re fun to make too. You’ll shape the dough into eerie finger forms, press on almond fingernails, and drizzle just the right amount of strawberry jam for that freshly-snapped look. In this guide, you’ll learn how to make the ultimate spooky Halloween finger cookies with easy-to-follow steps, tasty ingredients, and show-stopping presentation ideas.
Table of contents
Table of Contents
Frighteningly Fun to Make Spooky Halloween Fingers
The spooky charm of witch finger cookies
Halloween isn’t complete without a treat that gives you chills—in the best way. That’s why spooky Halloween fingers have become a must-bake for the season. Shaped like bony witch hands, these cookies go beyond basic sugar treats and offer a fun, slightly gross visual that kids and adults both enjoy. The gnarled finger shape, complete with wrinkles and jagged almond nails, gives a deliciously unsettling vibe that’s perfect for October gatherings.
Advertisement
This recipe turns everyday ingredients like flour, butter, and almonds into something surprisingly spooky. What sets it apart from other Halloween treats is the hand-crafted look—no cookie cutter required. The jam “blood” gives each cookie an extra pop of horror, while the almond “nails” add just the right texture and crunch. Want to get even more festive? Add green food coloring to the dough for a witchy skin tone and pair them with a spooky drink like this pumpkin protein shake for maximum Halloween fun.
Simple prep, shocking results
These spooky Halloween fingers might look like they belong in a haunted house, but they’re shockingly simple to make. The dough comes together quickly, especially with a stand mixer or food processor, and it’s very forgiving to work with. Unlike traditional sugar cookies that require rolling and cutting, this recipe lets you hand-shape each cookie into creepy perfection. Just roll, press, pinch, and bake—then decorate with a touch of jam for an ultra-realistic effect.
This treat is also perfect for party prep. You can make the dough a day ahead, shape the cookies in advance, and bake them off right before serving. Want to go all out? Present them on a dark platter next to other festive snacks like our crispy baked zucchini chips to balance the sweetness. It’s all about that spooky-sweet contrast—and these finger cookies never disappoint.
Ingredients and Dough Tips for the Perfect Spooky Fingers
Simple ingredients with creepy effects
You don’t need any special tools or hard-to-find ingredients to make spooky Halloween fingers—just a few pantry staples and a little creativity. The base is a simple shortbread-like cookie dough that holds its shape when baked, making it perfect for sculpting into eerie finger forms.
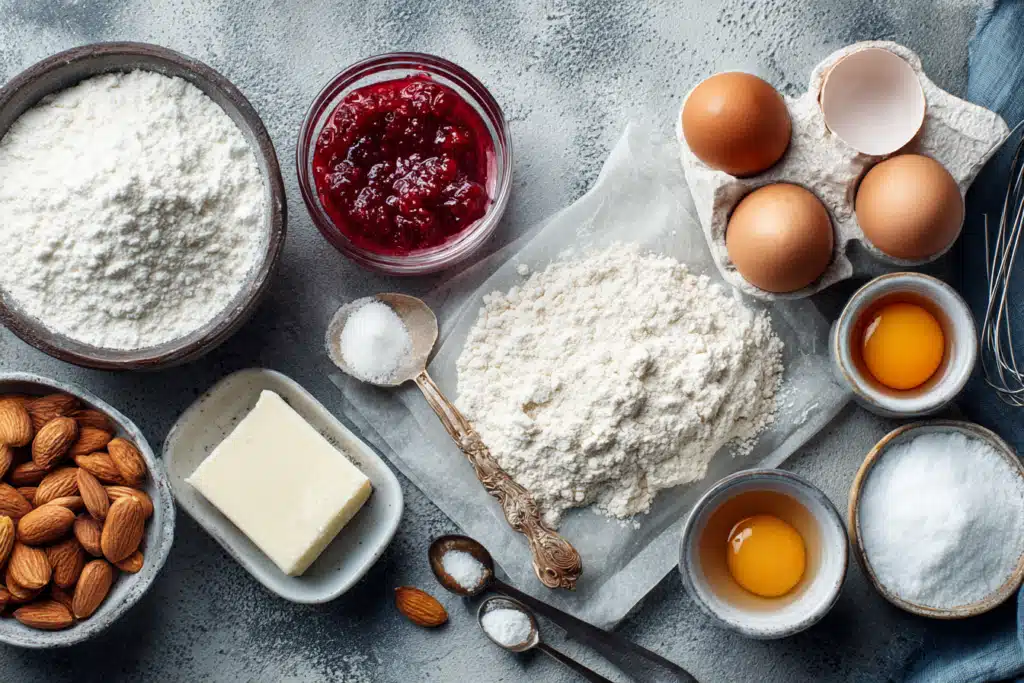
Here’s what you’ll need:
Advertisement
Spooky Halloween Fingers
Ingredients
Method
- In a large bowl, cream the softened butter and powdered sugar until smooth.
- Add vanilla and almond extract. Mix until combined.
- Stir in the salt and flour gradually to form a smooth dough.
- If desired, mix in green or gray food coloring for a spooky look.
- Wrap dough in plastic wrap and chill for at least 1 hour.
- Preheat oven to 325°F (160°C) and line baking sheets with parchment paper.
- Take small pieces of dough and roll into finger-sized logs.
- Press an almond half at one end for the nail, and score knuckle lines with a knife.
- Place shaped fingers on the tray and chill again for 10 minutes.
- Bake for 12–15 minutes until edges are lightly golden.
- Cool for 5 minutes on the tray before transferring to a wire rack.
- Once cool, lift almond, add a small dab of jam underneath, and press back into place for the blood effect.
Nutrition
Notes
- You can freeze shaped, unbaked fingers and bake directly from frozen.
- To make these nut-free, use pumpkin seeds or chocolate chips as nail alternatives.
- Use red gel instead of jam for a cleaner, less sticky result.
Tried this recipe?
Let us know how it was!- All-purpose flour: This is your structural base. No baking powder—these cookies shouldn’t puff.
- Unsalted butter: Use high-quality butter for a rich flavor and smooth texture.
- Powdered sugar: Dissolves quickly, helping the dough stay soft without spreading too much.
- Vanilla and almond extract: Vanilla adds warmth, and almond gives that subtle spooky sweetness.
- Salt: Just a pinch enhances everything else.
- Whole blanched almonds: These are your fingernails—split in half for a realistic shape.
- Red jam or gel: Raspberry or strawberry works best. This is your edible “blood.”
If you’re in the mood for a gluten-free variation, try swapping in almond flour and follow shaping tips from our almond flour shortbread cookies for a ghoulishly tender bite. Pairing these spooky treats with savory options like our keto jack-o’-lantern stuffed peppers makes for a chillingly delicious Halloween spread.
Chilling and shaping tips for realistic fingers
For spooky Halloween fingers to hold their terrifying shape, chilling the dough is key. After mixing, wrap the dough tightly in plastic wrap and refrigerate for at least one hour. This helps prevent spreading and makes it easier to sculpt.
When ready to shape, pinch off a small piece of dough and roll it into a log about the size of your pinky. Use your fingers to add subtle bends and knuckle marks. Press one half-almond onto the tip for the nail, and use the back of a knife to score shallow lines for joints.
Want to make them even creepier? Mix in a few drops of green or gray gel food coloring while blending your dough. This gives the fingers a rotting, undead look that’s perfect for Halloween tables. And if you’re prepping for a large crowd, double the recipe like we do in our double batch banana bread—because these creepy treats go fast!
Baking and Decorating: Making Them Extra Scary
Baking to golden perfection
Once your creepy cookie fingers are shaped and lined up on a tray, it’s time to bring them to life—or un-life. For the best results, preheat your oven to 325°F (160°C). Place the fingers at least two inches apart on a parchment-lined baking sheet. Since there’s no leavening, they won’t puff much, but the butter can cause slight spreading if the dough isn’t cold enough. That’s why a second chill—right on the tray—for 10 minutes before baking helps them hold their shape.
Bake for 12–15 minutes or until the bottoms just start to turn golden. You don’t want a deep brown; that ruins the effect. Let them cool on the tray for five minutes, then transfer to a wire rack. The cooling process firms up the fingers and makes them easier to handle for decorating.
Advertisement
Need a fun drink to serve alongside these spooky snacks? Our homemade caramel apple cider makes the perfect seasonal pairing and brings out the sweet almond flavors.
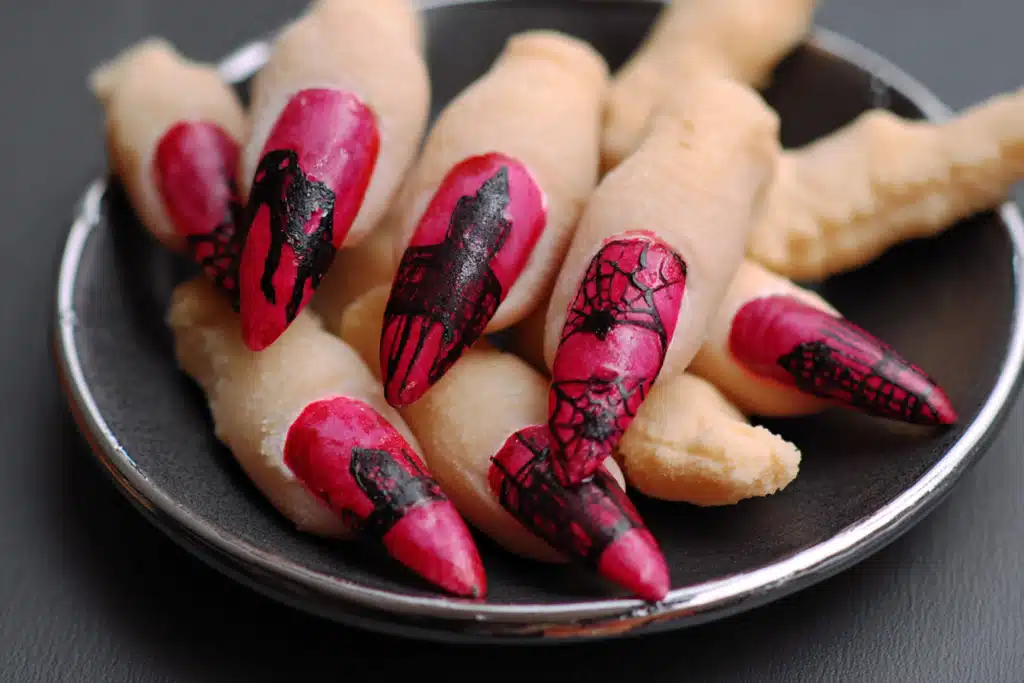
Add the fright factor: nails and “blood”
This is where the horror magic happens. Once the cookies are cooled but still slightly warm, press a small dab of red jam—like raspberry or strawberry—beneath each almond “nail.” Then firmly press the almond into place so it sticks. As the jam oozes out, it mimics blood in the most deliciously disturbing way.
You can also use red decorating gel if you prefer a cleaner look. Want even more impact? Lift the almond, add a generous drop of jam or melted red candy melts, and let it drizzle down like a freshly severed finger. A little black or green food coloring mixed into a few fingers can add a rotting zombie vibe.
Finish the look by adding more knuckle creases with a knife or toothpick. If they’ve faded while baking, just score them lightly again. This adds texture and realism. These witchy fingers pair well with other themed bites like Halloween ghost quesadillas to round out your spooky food table.
Serving, Storing, and Halloween Presentation Ideas
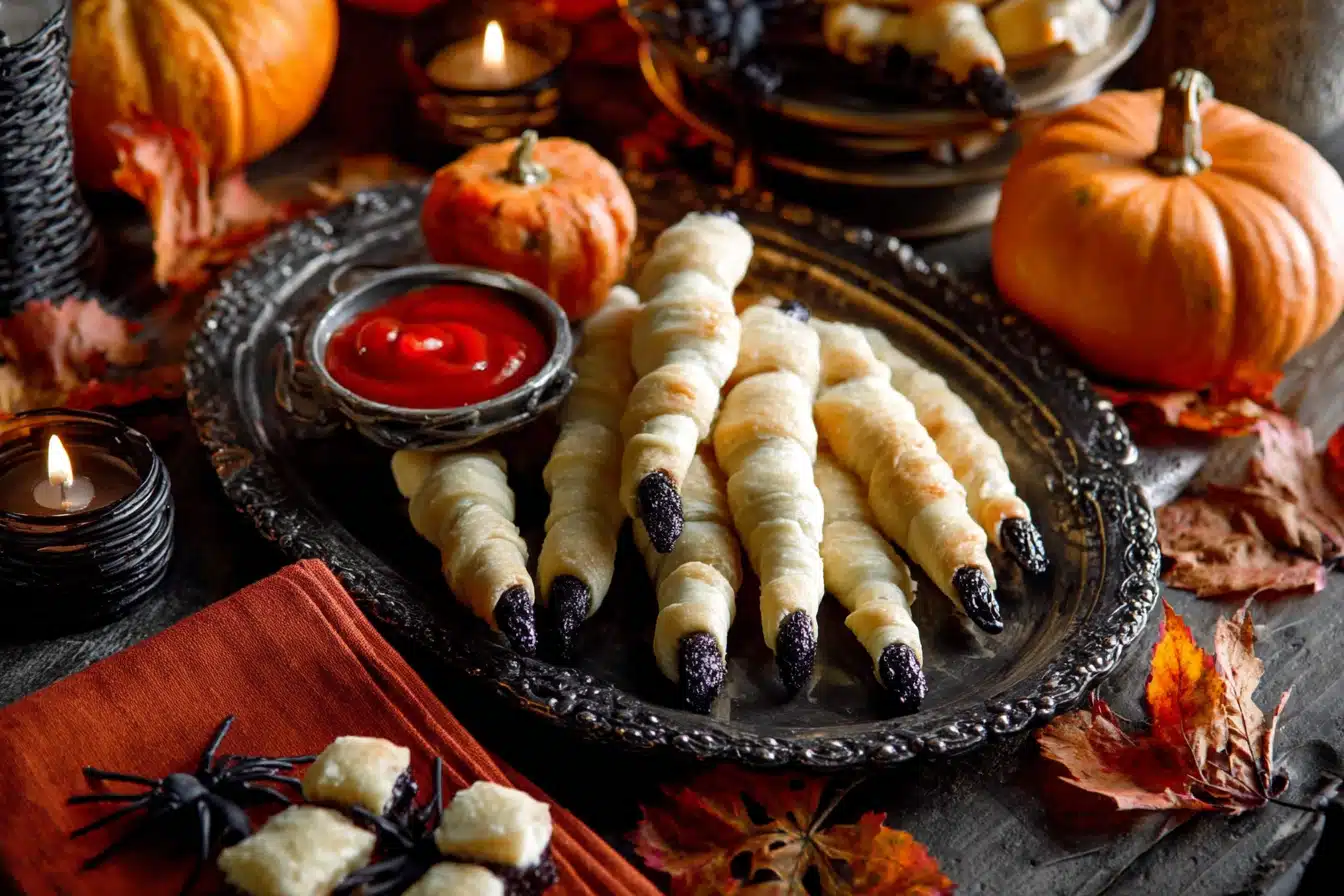
Creative serving ideas for your spooky treats
Now that your spooky Halloween fingers are baked and bloodied, it’s time to show them off. Presentation is everything when it comes to creepy treats. Start by arranging the fingers on a black or dark wood board to enhance their horror-movie effect. Scatter plastic spiders, eyeball candies, or even a few sprigs of rosemary to look like gnarled vines creeping across the tray.
If you’re hosting a Halloween party, serve these cookies alongside themed appetizers for contrast. Our keto jack-o’-lantern stuffed peppers and protein-rich spider deviled eggs make a balanced and eerie party spread. For kids, try sticking the fingers upright into a foam head wrapped in foil—think “witch head centerpiece”—for a spooky surprise when they pull one out.
Want a more elegant twist? Stack the cookies in a clear jar labeled “Witch’s Severed Fingers” and wrap it in twine. It’s a fun hostess gift or Halloween potluck addition that draws attention and plenty of laughs.
Storage tips and make-ahead options
The best part about spooky Halloween fingers is how well they hold up. You can make the dough up to 3 days ahead and keep it chilled. Shaped fingers can also be frozen raw on a tray, then transferred to a zip-top bag—just bake straight from frozen with an extra 1–2 minutes added.
Once baked, these cookies stay fresh for up to 5 days in an airtight container at room temperature. If you’ve used jam for the “blood,” it may soften the area around the almond slightly after a couple of days, but the texture still holds. For longer storage, skip the jam until the day you plan to serve them.
Planning a full menu of festive eats? Pair these cookies with something refreshing like our watermelon Halloween punch to keep guests cool between bites.
Whether you’re prepping days in advance or baking the night before, these witchy treats remain the centerpiece of any Halloween dessert table.
FAQs
What are spooky Halloween fingers made of?
Spooky Halloween fingers are typically made from a simple sugar or shortbread cookie dough. They’re shaped to resemble creepy fingers, often using blanched almonds for fingernails and red jam or gel to simulate blood. The spooky design makes them a Halloween favorite.
Can I make spooky Halloween fingers without almonds?
Yes, you can. If you’re avoiding nuts or need an allergy-safe version, substitute the almond nails with pumpkin seeds, pretzel sticks, or chocolate chips shaped into claws. These alternatives still give that eerie effect while keeping the recipe inclusive.
How do you get the fingers to look realistic?
The key to realistic spooky Halloween fingers is hand-shaping each cookie, adding slight bends for joint realism, and scoring lines with a knife to mimic knuckles. Using red jam under the almond “nail” adds a bloody, freshly severed look that’s incredibly effective.
Can I freeze spooky Halloween fingers?
Absolutely. Shape the dough into fingers, place them on a tray to freeze, then transfer to a freezer-safe bag. Bake from frozen with just a minute or two added to the baking time. You can also freeze the baked cookies, but add the jam and “nails” after thawing for best texture.
Conclusion
Spooky Halloween fingers aren’t just cookies—they’re a Halloween experience. Whether you’re baking with kids, hosting a haunted bash, or just want to serve something truly memorable, this recipe delivers on every front. It’s easy to prep, frighteningly fun to decorate, and always gets a reaction.
Once you master these finger cookies, you’ll never look at Halloween treats the same way again. Now, gather your ingredients, fire up the oven, and get ready to make spooky magic.